
By: Amie Pagan
Before there was a loaf of sourdough cooling on the counter, there was a humble jar of flour and water bubbling away in the kitchen. As someone who spent years baking professionally, I’ve always loved the magic of watching simple ingredients transform into something extraordinary. Creating your own sourdough starter is a lesson in patience, but it’s also a reminder that some of the best things are worth waiting for. This starter is the foundation for countless homemade breads and a tradition you’ll enjoy sharing around your own table.
If you’ve ever dreamed of pulling a beautiful loaf of homemade sourdough from your oven, it all starts with a sourdough starter. Don’t let the process intimidate you—at its core, a starter is simply flour and water that, over time, develops the natural yeast and beneficial bacteria needed to make bread rise. No packets of yeast required.
As you work through the process, you’ll hear the term “feeding” your starter. All that means is discarding a portion and giving it fresh flour and water to keep it healthy, active, and ready to bake with.
I like to begin with whole wheat flour because it gives the starter a little extra boost in those early days. Whole wheat contains more nutrients and naturally occurring microorganisms, which helps get the fermentation process going. Once the starter is bubbly and thriving, you’ll switch to all-purpose flour for a more versatile starter that works beautifully in just about any sourdough recipe.
Creating a starter from scratch takes about a week, but don’t worry—most days require just a few minutes of attention. Think of it as a little kitchen ritual. Before you know it, you’ll have a lively starter ready to bake with, and with a quick weekly feeding, it can live in your refrigerator for years. Some starters have been passed down for generations, and yours just might become one of them.
WHAT YOU’LL NEED
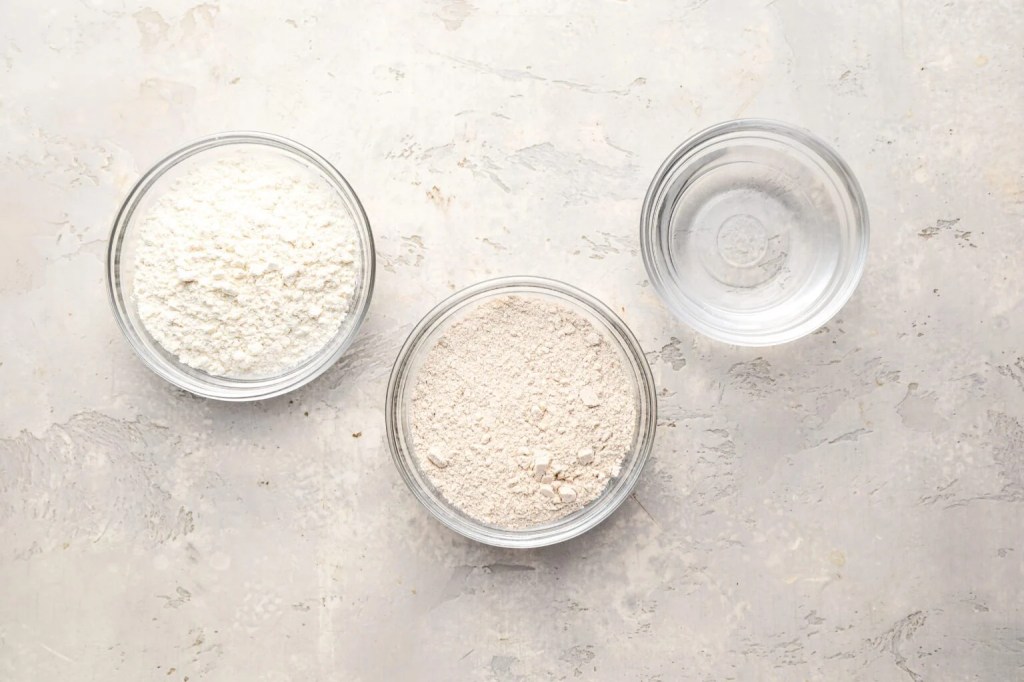
- WHOLE WHEAT FLOUR: I like to start my sourdough starter with whole wheat flour because it’s rich in nutrients and naturally occurring microorganisms that help kick-start the fermentation process. Think of it as giving your starter the best possible head start.
- ALL PURPOSE FLOUR: Once the starter becomes active and bubbly, all-purpose flour takes over. It creates a versatile starter with a mild flavor that’s perfect for everything from artisan loaves to pizza dough and sandwich bread.
- WATER: Water is just as important as the flour. If your tap water contains chlorine, it can slow down or inhibit fermentation, so filtered or dechlorinated water is your best choice for a healthy, thriving starter.
- A GLASS JAR OR CONTAINER: You’ll need a clean glass jar large enough to allow your starter room to grow. As the natural yeast develops, your starter will rise and become bubbly, so choose a container with plenty of extra space.
- KITCHEN SCALE (recommended): While measuring cups can work, a kitchen scale provides the most accurate results. Consistent measurements help create a healthy starter and make the feeding process much easier.
- PATIENCE: This may not be an ingredient you can buy at the grocery store, but it’s the most important one. Building a sourdough starter takes about a week, and every kitchen is a little different. Trust the process—those bubbles will come.
Jump to printable recipe for precise measurements
STEP-BY-STEP INSTRUCTIONS
Day 1 – Mix the starter: n a clean jar or bowl, mix 60g (½ cup) whole wheat flour with 60ml (¼ cup) warm water (80 to 85°F). Stir until no dry flour remains, scrape down the sides, cover loosely, and let rest at room temperature (70 to 75°F) for 24 hours.
Pro Tip: If using a bowl, use a clear one if you have it—you’ll be able to watch the bubbles forming and see how much it rises each day.
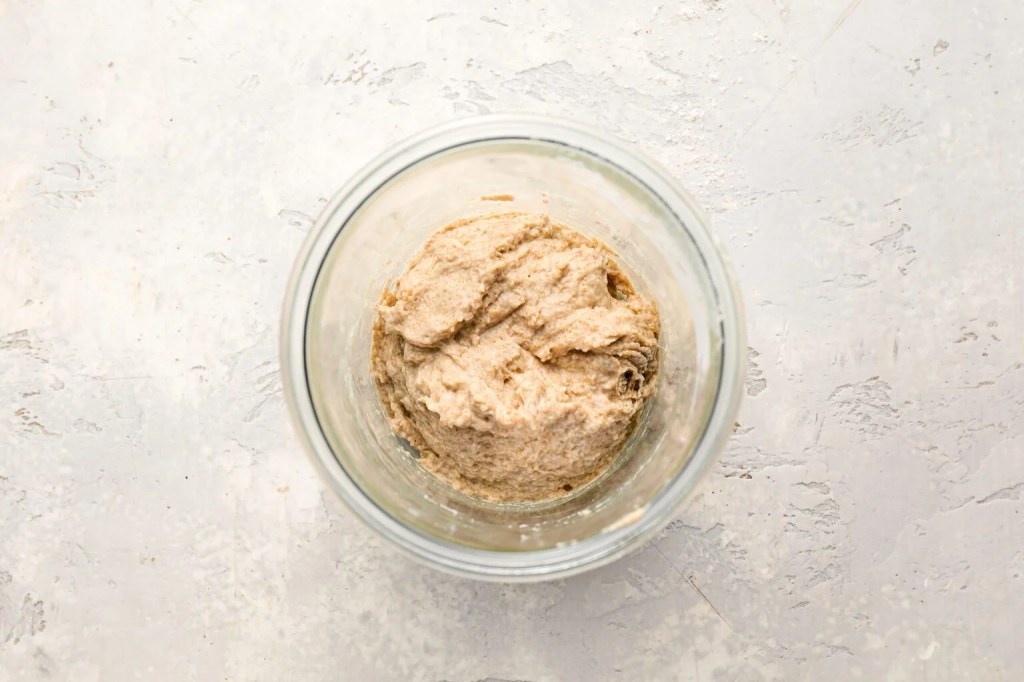
Day 2 – Stir only: No feeding today—just give the starter a good stir to redistribute the yeast and bacteria. Cover loosely and let it rest at room temperature. Don’t worry if it doesn’t look much different than Day 1; that’s totally normal.
Pro Tip: Stir vigorously when redistributing—oxygen helps the yeast and bacteria develop, so don’t be shy about whipping some air into the mix.
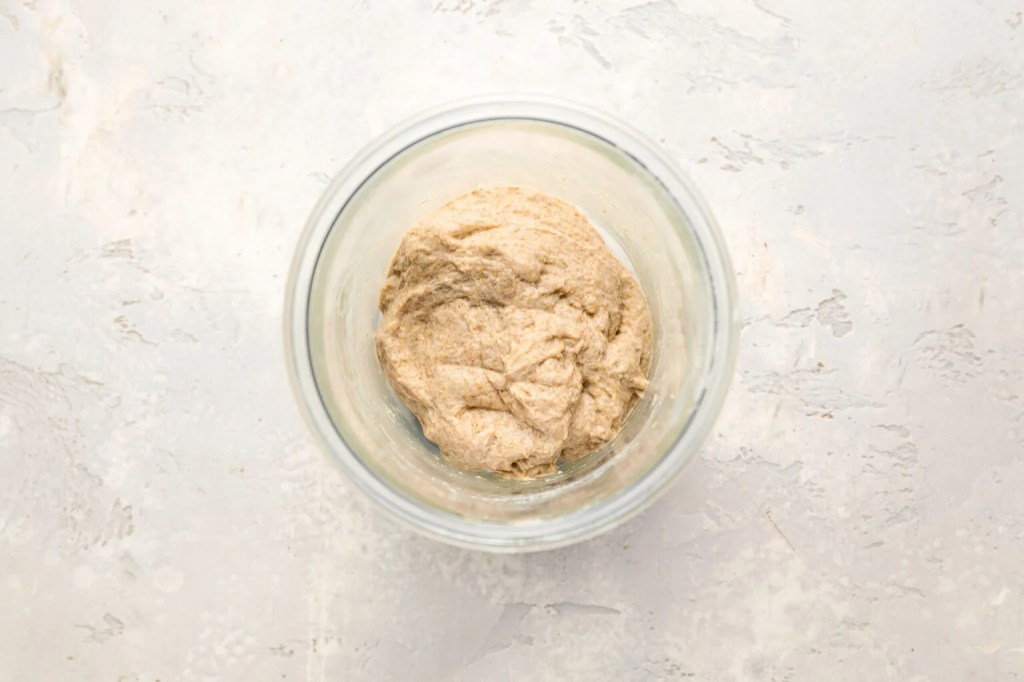
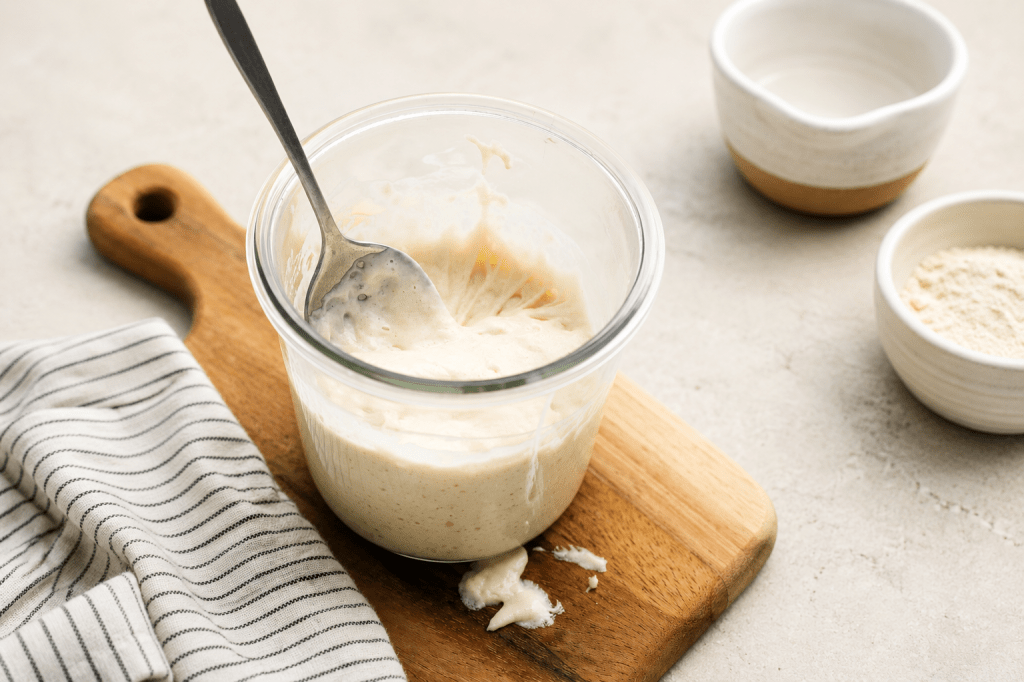
Day 3 through 7 – Begin daily feedings: From here on out, you’ll feed the starter once a day. Each day, discard half of it, then stir in 60 g (½ cup) all-purpose flour and 60 ml (¼ cup) warm water. Cover loosely and let it sit at room temperature. By Day 5, you should start to see some real activity—bubbling and rising.
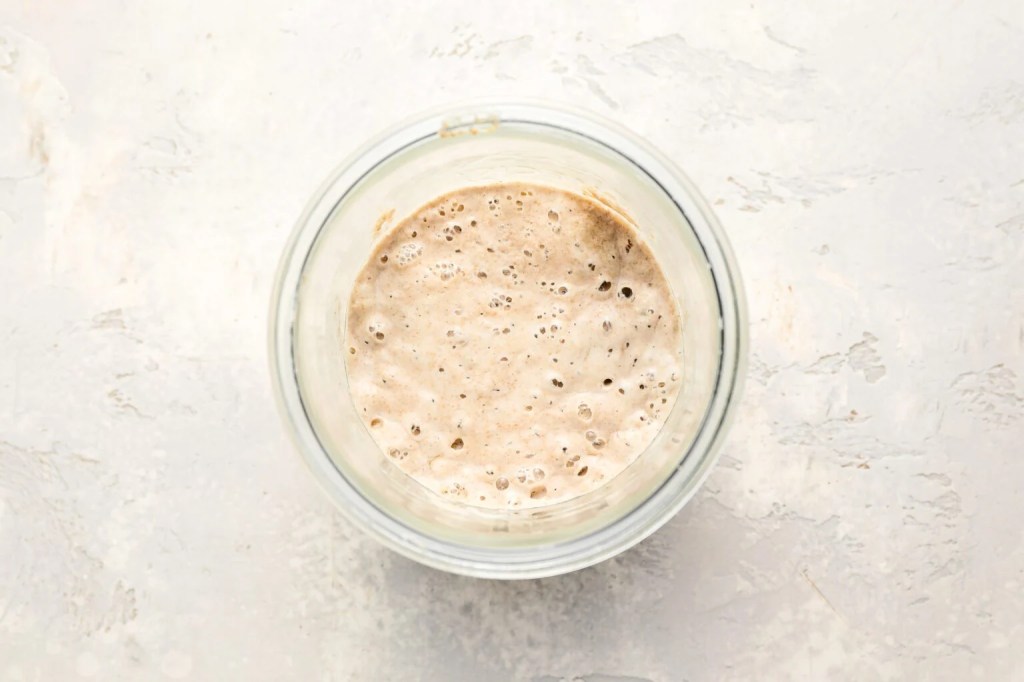
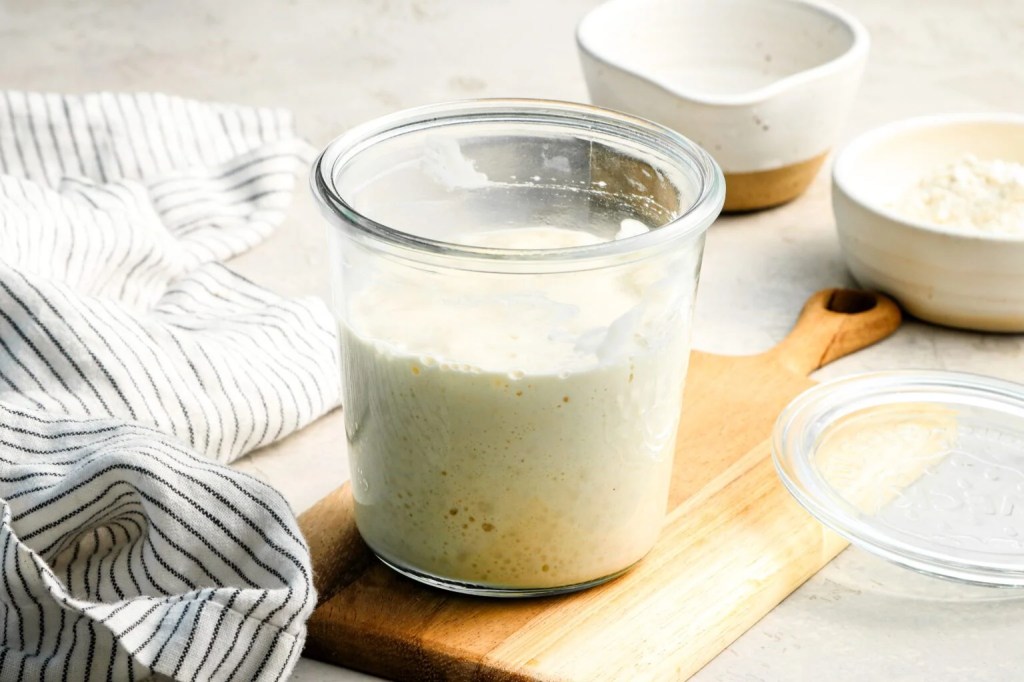
By Day 7, a healthy starter should double in size within 4 to 6 hours and smell pleasantly tangy. If it’s not quite there yet, just keep up the daily feedings until it is. Once it’s strong and bubbly, transfer it to a clean jar. You can use it right away or store it for later.
Pro Tip: Use a rubber band or piece of tape to mark the starter’s level right after feeding. It’s the easiest way to track how much it rises without guesswork.
MAINTAINING YOUR SOURDOUGH STARTER
To keep your starter happy and active, you’ll need to give it regular feedings—don’t worry, it’s simple. If you bake a few times a week, it’s easiest to keep your starter at room temperature and feed it daily. Each day, discard down to about 60 g (3 tablespoons), then add 60 g (½ cup) flour and 60 ml (¼ cup) water. Stir well, cover loosely, and let it do its thing.
If you bake less often—say once a week or so—store the starter in the fridge and feed it weekly the same way. After each feeding, leave it out for a few hours to get bubbly again before tucking it back into the fridge.
MORE SOURDOUGH STARTER TIPS
- Consistency check: Your starter should have the texture of thick pancake batter with a bit of stretch when you stir it. If it feels too dry or too soupy, adjust the flour-to-water ratio slightly until it looks and feels right.
- Don’t toss your discard: Use extra starter in pancakes, waffles, crackers, or even to kick off a quick batch of pizza dough—it adds great flavor and reduces waste.
Sourdough Starter
Ingredients
- Whole wheat flour
- All purpose flour
- Water
Directions
- Day 1: In a clean jar or bowl, mix 60g (½ cup) whole wheat flour with 60ml (¼ cup) warm water (80 to 85°F/27 to 29°C ). Stir until no dry flour remains. Scrape down the sides, cover loosely with a lid or clean towel, and let it rest at room temperature (70 to 75°F/21 to 24°C) for 24 hours.
- Day 2: No feeding today. Just give the mixture a good stir to redistribute the developing wild yeast and bacteria. Cover loosely again and let it continue resting at room temperature.
- Days 3 through 7: You’ll now feed your starter once a day. Each day, discard about half the starter (roughly 60g or ½ cup; you can weigh or eyeball it—no need to be exact). The texture will be very stretchy. Add 60g (½ cup) all-purpose flour and 60ml (¼ cup) warm water. Stir well, cover loosely, and let it rest at room temperature until the next day. By Day 5 or so, you should see regular bubbling and a noticeable rise. By Day 7, your starter should double in volume within 4 to 6 hours of feeding and smell pleasantly tangy. If it does, you’re ready to bake! If not, continue daily feedings until it’s consistently active. (Not sure if it’s ready? Do the float test: drop a teaspoon of bubbly, recently fed starter into a glass of water—if it floats, it’s good to go.) Once it’s active/ready to bake with, transfer your starter to a clean jar. You can use the starter right away or store it for later (see below for how to maintain your starter).
- Maintain: If you bake a few times a week, keep your starter at room temperature and feed it once a day. First, by discarding most of it (leaving about 60g or 3 tablespoons), then adding 60g (½ cup) flour and 60ml (¼ cup) water. Stir well and cover loosely. If you bake once a week or less, store your starter in the refrigerator and feed it the same way about once a week. After feeding, let it sit at room temperature for a few hours to become active before putting it back in the fridge.


Leave a comment